Exporting a Certificate From A Windows Server
First things first, you need to get the certificate installed. If you have already done that, feel free to proceed, but if you need to do the initial install before exporting, try following the installation guides first.
On to it then…
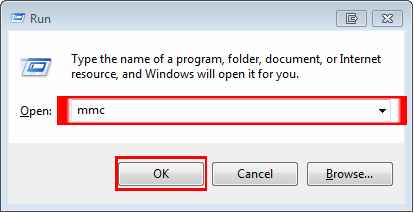
Open MMC (Start > Run > MMC) Click ‘OK.’

Click ‘File.’ Select ‘Add/Remove Snap-in.’
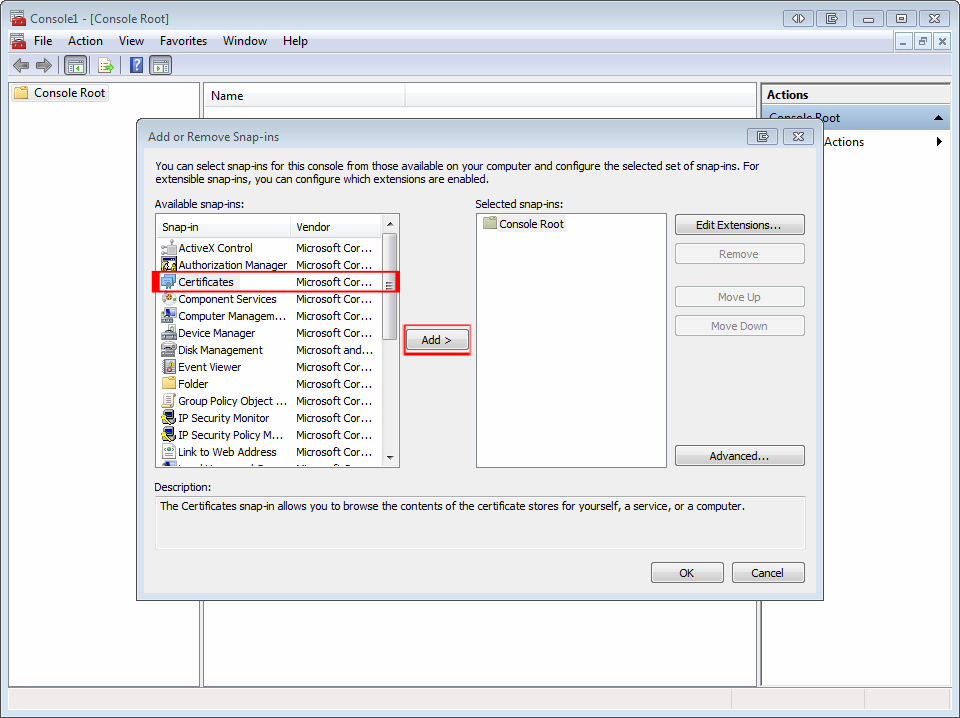
Select ‘Certificates,’ and then click the ‘Add’ button.
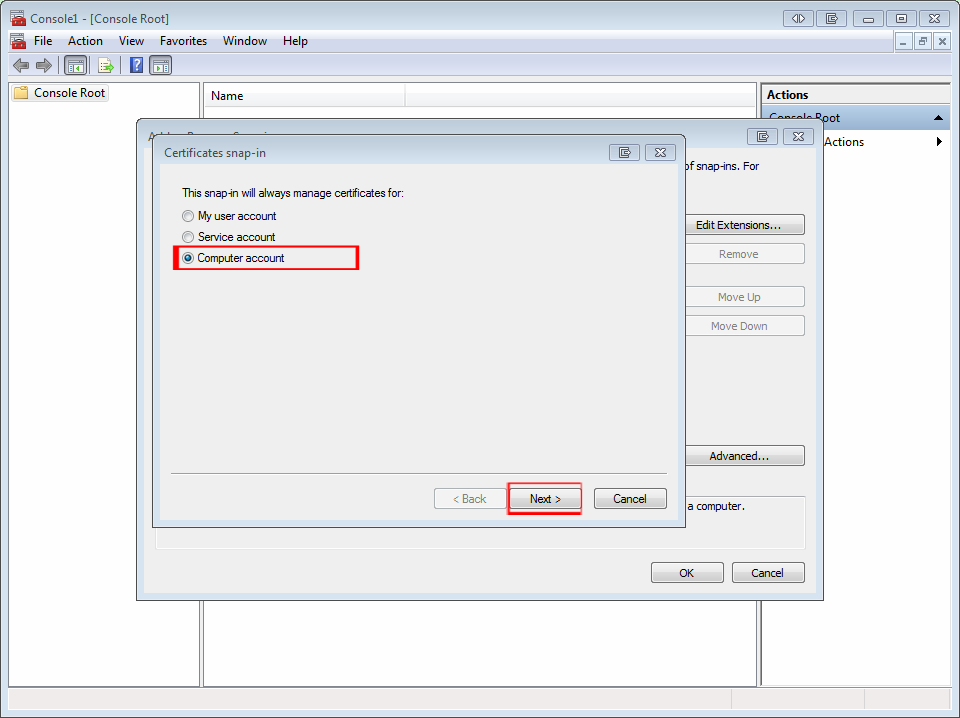
Select ‘Computer account,’ then hit the ‘Next’ button.
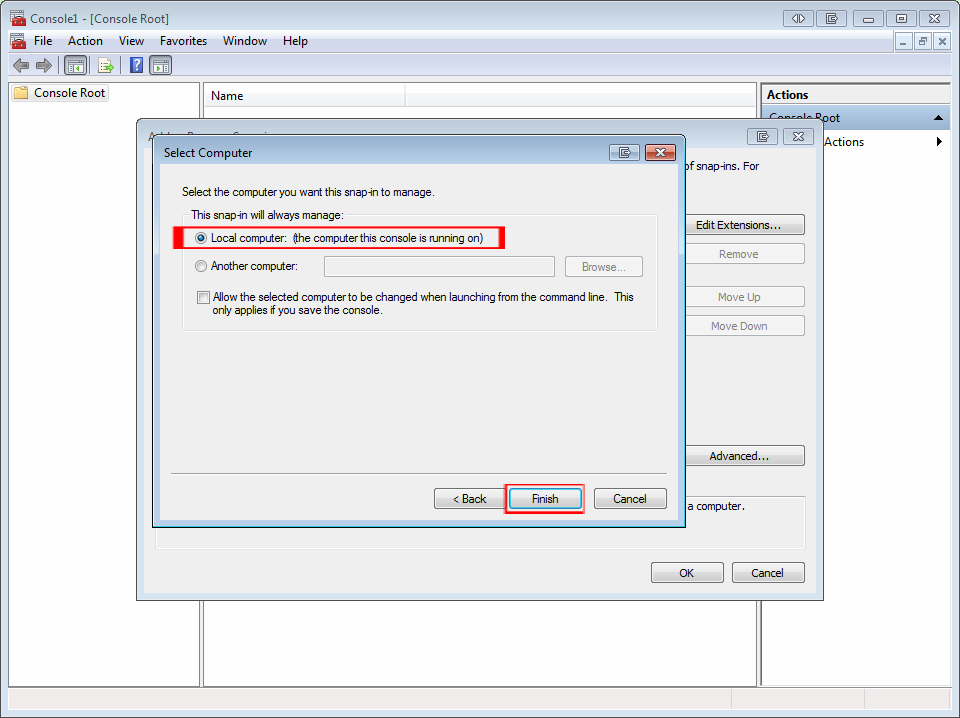
Select ‘Local Computer,’ then ‘Finish.’
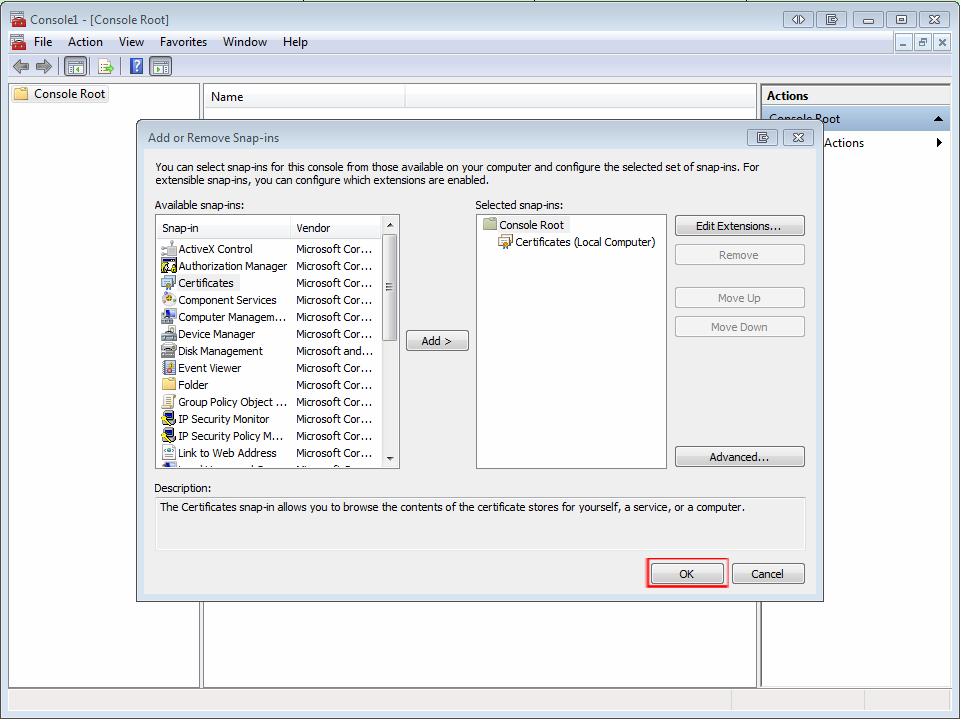
Click ‘OK.’
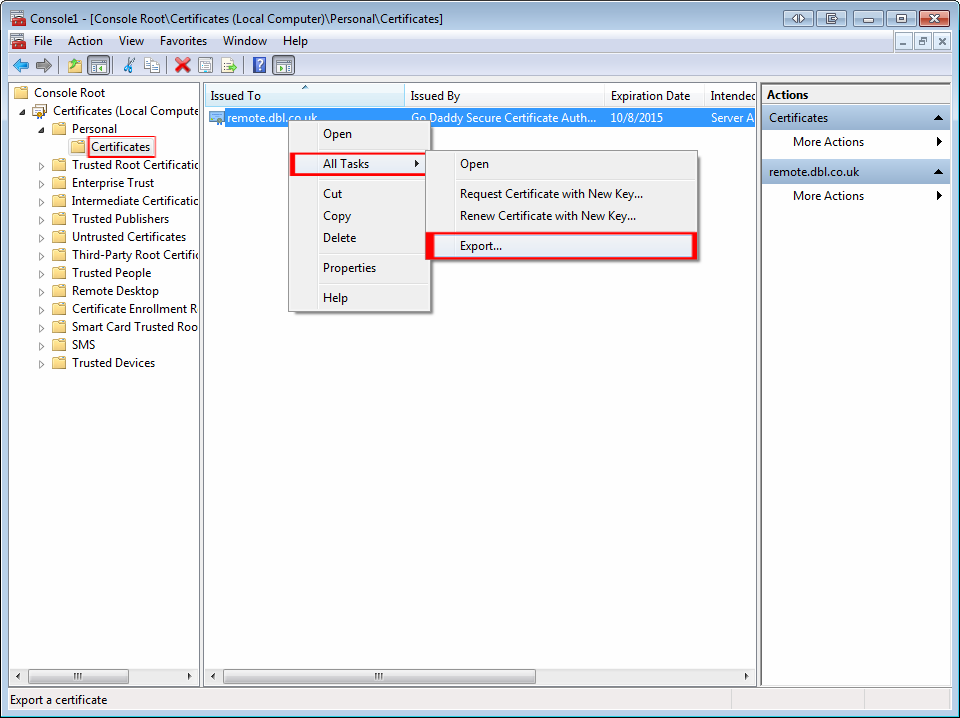
Open the ‘Personal’ store from the Console Root on the left, right click the certificate you are exporting, and select ‘Export.’
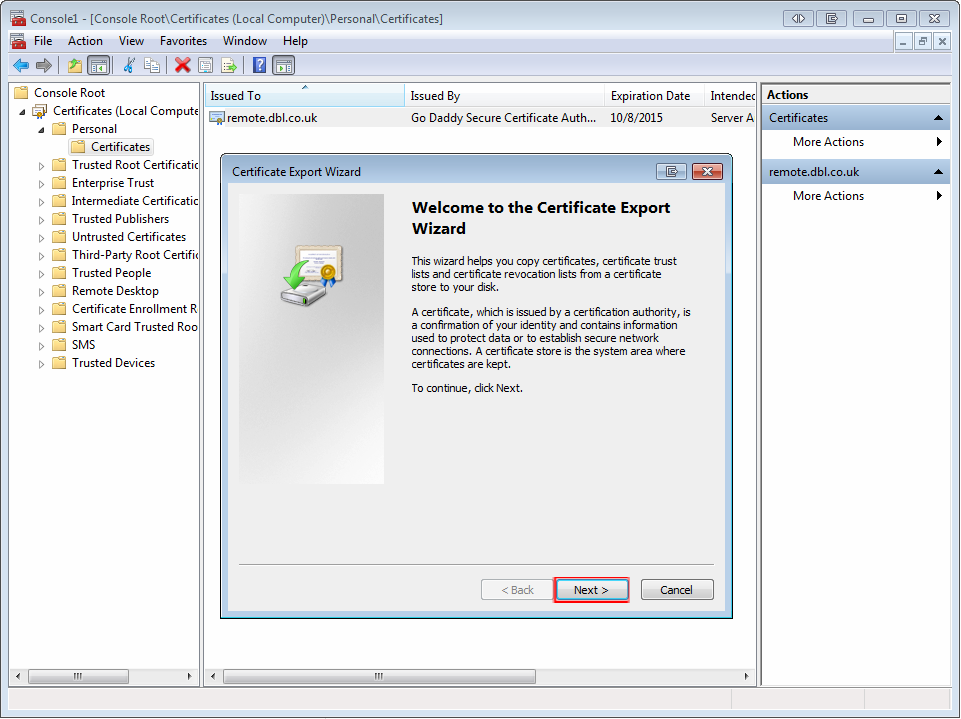
Hit ‘Next’ on the Certificate Export Wizard screen.
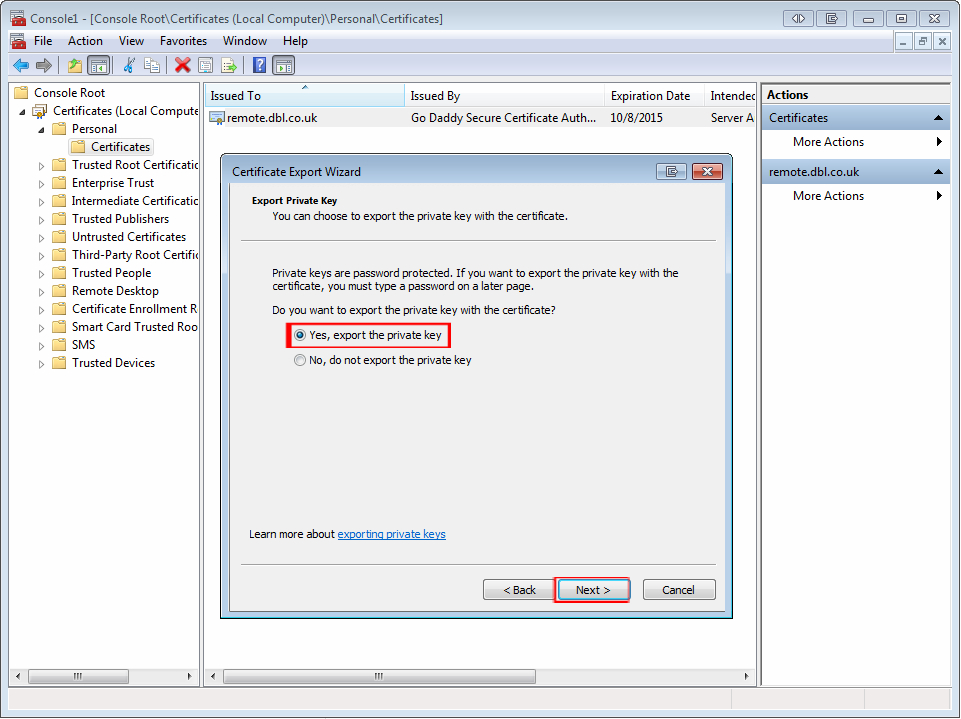
Select ‘Yes, export the private key,’ and then click ‘Next.’

Select to make the export in a PFX format, and select ‘Include all certificates in the certification path if possibe,’ and ‘Export all extended properties,’ but DO NOT SELECT ‘Delete the private key if the export is successful,’ and then click ‘Next.’

Enter and Re-Enter a password to use with your export file to secure it in transit, and click ‘Next.’

Browse to the file location you want to save the export to and click ‘Next.’
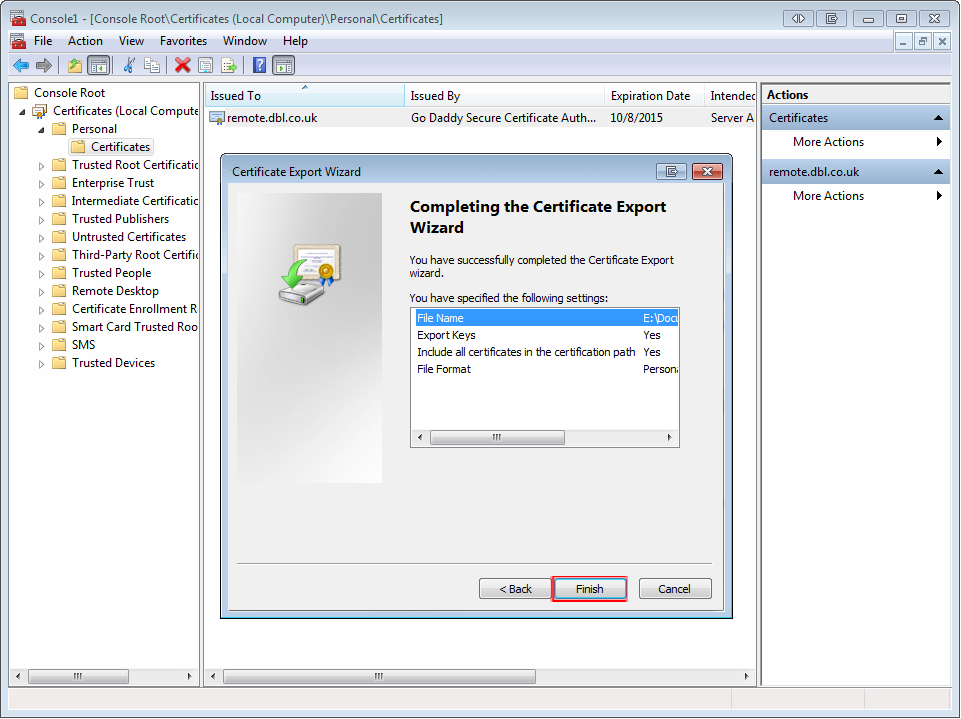
She done! Hit Finish and prepare to import!